Firebase App Check with Node.js and Flutter
While working at a software house, one of our clients asked us to implement a proof of concept for a new security feature called Firebase App Check. The goal was to ensure that their API resources were being called from their mobile app and not from a malicious source.
Firebase App Check is a security feature that helps protect your API resources from abuse by preventing unauthorized clients from accessing your backend resources. It works with both Firebase services, Google Cloud services, and your own APIs to keep your resources safe.
For our proof of concept, we will implement a simple counter with Node.js and a Flutter app that will increment this counter. The counter will only increment if the request is coming from the Flutter app.
Prerequisites
Before we start, make sure you have the following installed:
- Node.js and
pnpmor an equivalent package manager - Flutter
- A Firebase account
The backend with Node.js
We will start by creating a simple Node.js server that will have two endpoints - one to get the current counter value and another to increment it.
mkdir counter-api
cd counter-api
pnpm init -y
pnpm add express cors
touch server.js
Our server will look like this:
// server.js
const express = require("express");
const cors = require("cors")({ origin: true });

const port = 4000;
const app = express();
app.use(express.json());
// Enable All CORS Requests
app.use(cors);

// Note that in a real-world scenario
// you should not use a global variable
// to store the counter
let counter = 0;

app.get("/counter", (req, res) => {
  res.json({ counter });
});

app.post("/counter", (req, res) => {
  counter++;
  res.json({ counter });
});

app.listen(port, () => {
  console.log(`Server running at http://localhost:${port}`);
});
To run the server, execute:
node server.js
Testing the server with curl
If we see the same output as below, our server is working as expected.
curl http://localhost:4000/counter
# {"counter":0}

curl -X POST http://localhost:4000/counter
# {"counter":1}

curl http://localhost:4000/counter
# {"counter":1}
The Flutter app
Now let's create a Flutter app that will increment the counter on our Node.js server.
flutter create --platform ios,android counter_app
cd counter_app
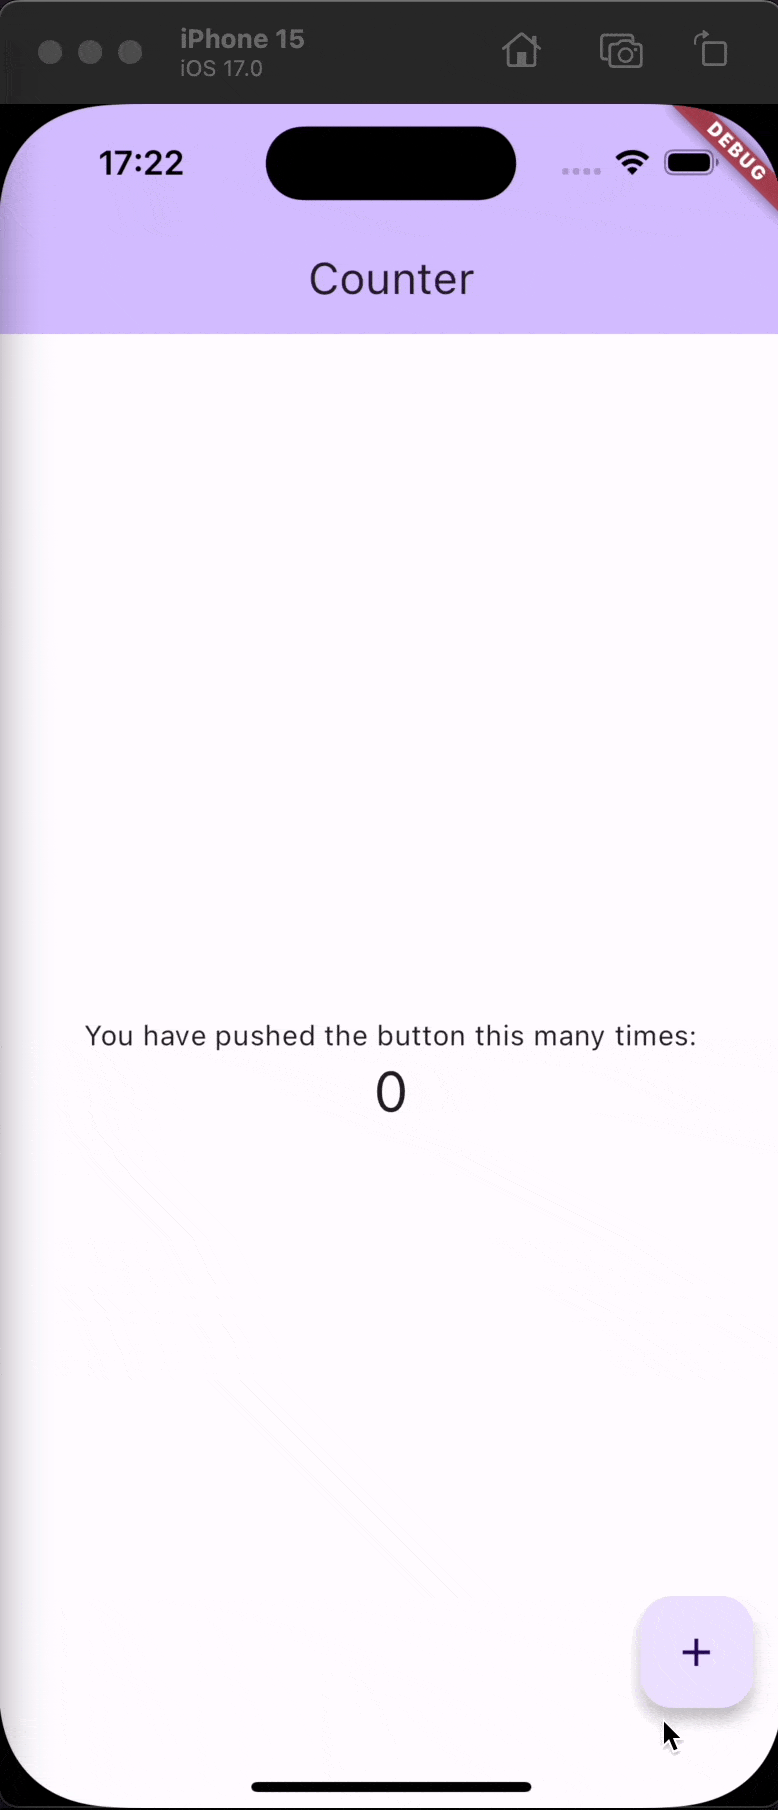
At the time of writing, the Flutter boilerplate code for our app is already a counter app. We will only need to change the boilerplate a little bit to integrate it with our counter-api.
Our main.dart will look like this:
Note that you might have comments in your main.dart file that we are omitting here for brevity. We also changed the apps and home page titles to something more meaningful for our proof of concept.
// main.dart import 'package:flutter/material.dart'; void main() { runApp(const MyApp()); } class MyApp extends StatelessWidget { const MyApp({super.key}); Widget build(BuildContext context) { return MaterialApp( title: 'Counter App', theme: ThemeData( colorScheme: ColorScheme.fromSeed(seedColor: Colors.deepPurple), useMaterial3: true, ), home: const MyHomePage(title: 'Counter'), ); } } class MyHomePage extends StatefulWidget { const MyHomePage({super.key, required this.title}); final String title; State<MyHomePage> createState() => _MyHomePageState(); } class _MyHomePageState extends State<MyHomePage> { int _counter = 0; void _incrementCounter() { setState(() { _counter++; }); } Widget build(BuildContext context) { return Scaffold( appBar: AppBar( backgroundColor: Theme.of(context).colorScheme.inversePrimary, title: Text(widget.title), ), body: Center( child: Column( mainAxisAlignment: MainAxisAlignment.center, children: <Widget>[ const Text( 'You have pushed the button this many times:', ), Text( '$_counter', style: Theme.of(context).textTheme.headlineMedium, ), ], ), ), floatingActionButton: FloatingActionButton( onPressed: _incrementCounter, tooltip: 'Increment', child: const Icon(Icons.add), ), ); } }
When we run the app with flutter run, we should see a counter app that increments the counter every time we press the floating action button. The counter resets every time we reload or restart the app.
Time to integrate with our counter-api
To integrate our Flutter app with our counter-api, we will use the dio plugin to make requests to our server. Any other package that makes HTTP requests will work as well.
flutter pub add dio
First things first, let's get the current counter value from our server when the app starts. We will use the initState method to make the initial request and update our app's state.
// main.dart import 'package:flutter/material.dart'; import 'package:dio/dio.dart'; const kApiUrl = 'http://localhost:4000'; ... class _MyHomePageState extends State<MyHomePage> { int _counter = 0; final dio = Dio(); void _getCounter() async { try { final response = await dio.get( '$kApiUrl/counter', ); setState(() { _counter = response.data['counter']; }); } catch (e) { debugPrint(e.toString()); } } void _incrementCounter() { setState(() { _counter++; }); } void initState() { super.initState(); _getCounter(); } ... }
Now we need to increment the counter in our server when we press the floating action button. We will change the _incrementCounter method to make a POST request to our server and update the counter in our app.
// main.dart
  ...

  void _incrementCounter() async {
    try {
      final response = await dio.post(
        '$kApiUrl/counter',
      );
      setState(() {
        _counter = response.data['counter'];
      });
    } catch (e) {
      debugPrint(e.toString());
    }
  }

  ...
If you didn't kill the server until this point, we should see the counter on our app start at the value we left it at. When we press the floating action button, the counter should increment and if we reload/restart the app, the counter should reflect our last changes.
Setting up Firebase App Check
Now that we have our app and server working, we can set up Firebase App Check to protect our server from abuse.
First, we need to enable Firebase App Check in our Firebase project
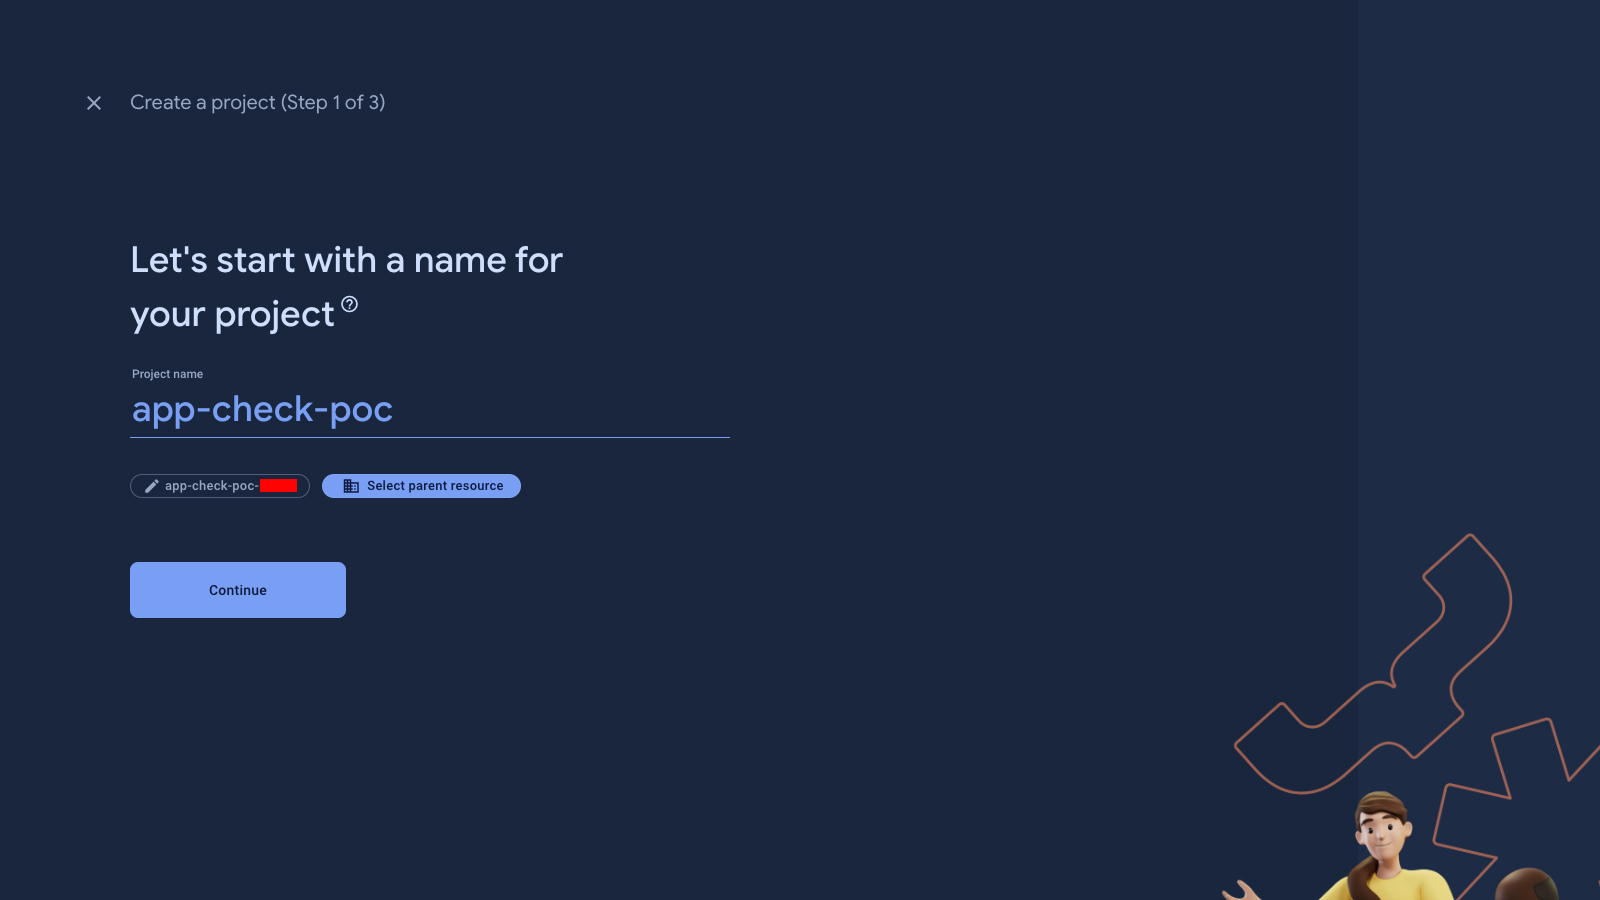
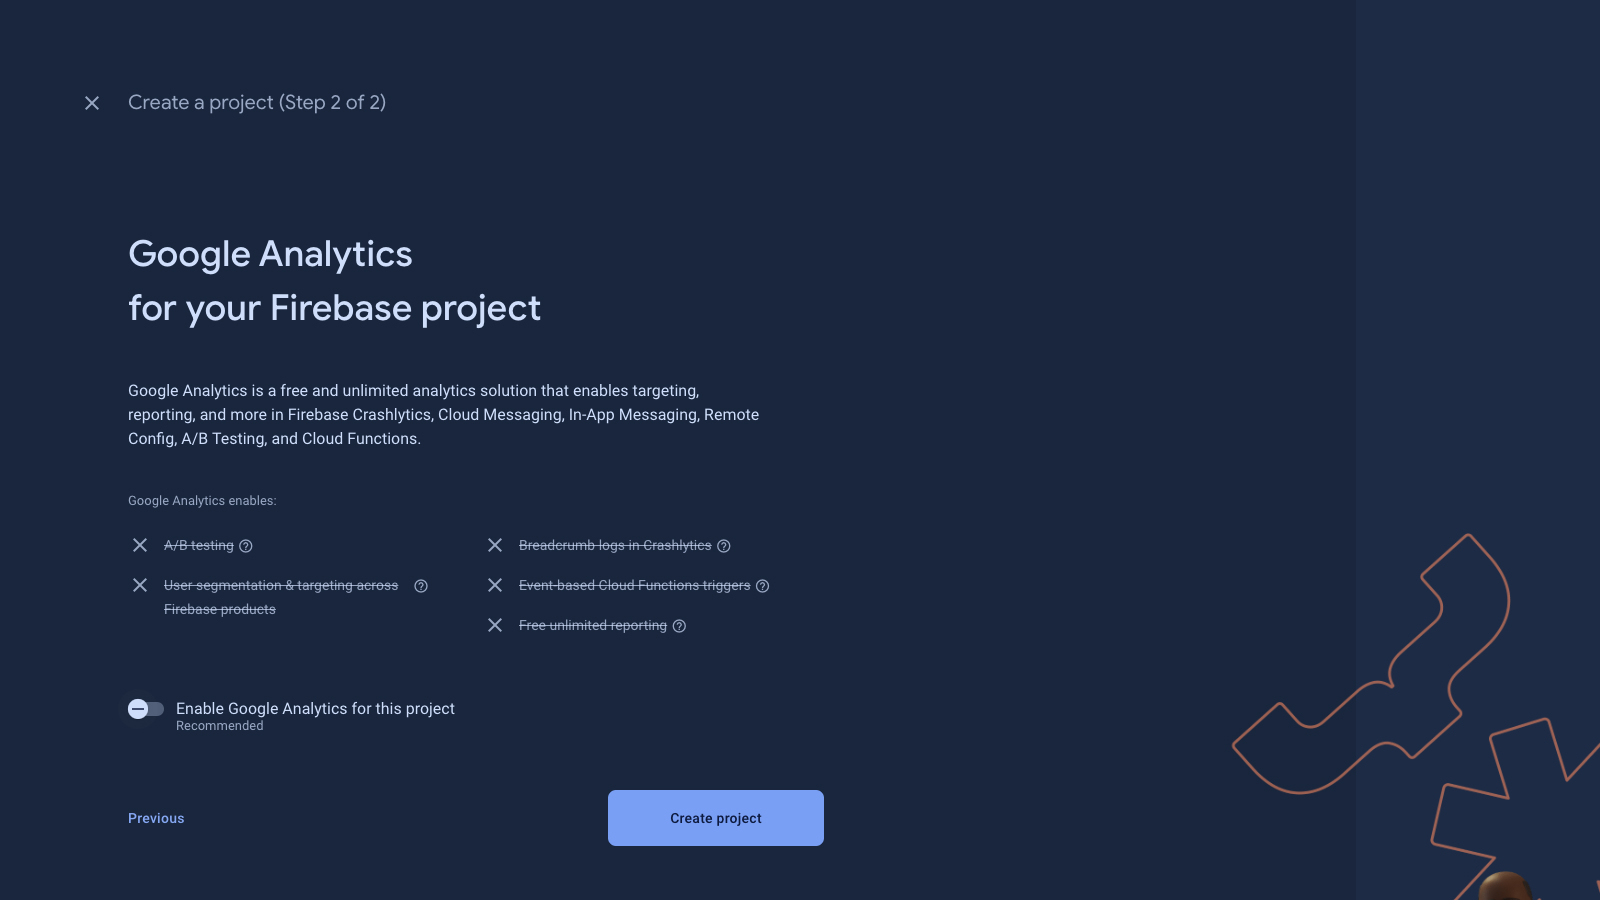
Go to the Firebase console and create a new project.
No need to enable Google Analytics if you don't want to. We can always enable it later if we need to.
After creating the project, we can add Firebase to the app. FlutterFire is pretty straightforward to set up. Make sure you select the correct project and platforms and follow the instructions.
firebase login
dart pub global activate flutterfire_cli
flutterfire configure
Adding Firebase and App Check to our app is also straightforward. We will use the firebase_core and firebase_app_check plugins to initialize Firebase and App Check in our app.
flutter pub add firebase_core firebase_app_check
flutterfire configure
If everything went well, you should see a new file called firebase_options.dart in your project next to your main.dart in the lib folder.
At this point, we should be able to see our apps (android and ios) in the Firebase console.

Back to to our server, we need to add the Firebase Admin SDK and protect our endpoints with App Check
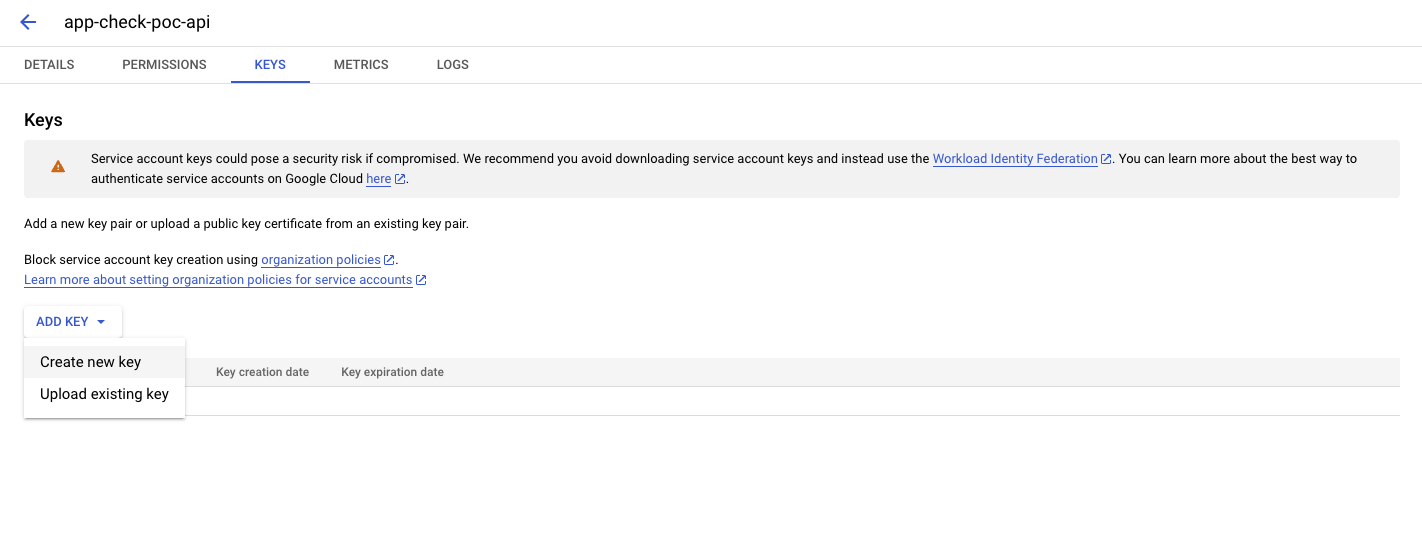
We'll start by creating a service account and downloading the key file in JSON format. We will use this file to initialize the Firebase Admin SDK in our server.
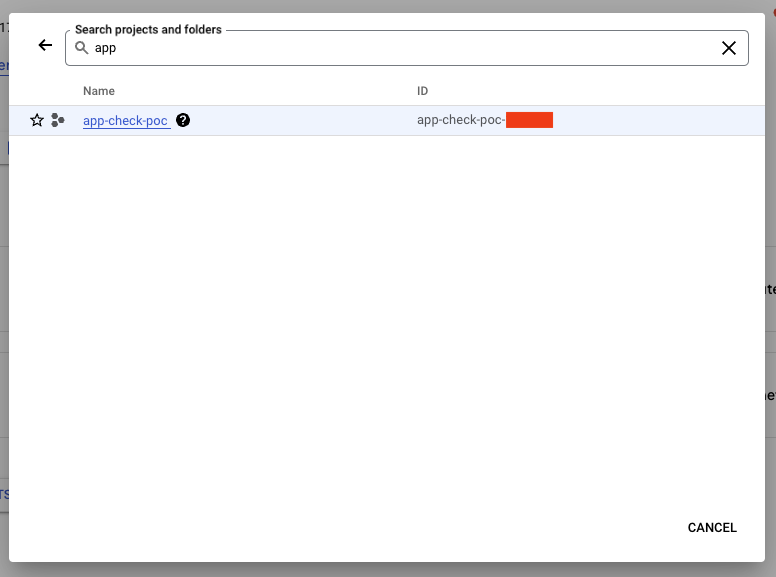
Go to Google Cloud Console, make sure you're in the correct organization, search for your project, and select it.
Then go to IAM & Admin > Service Accounts and create a new service account.
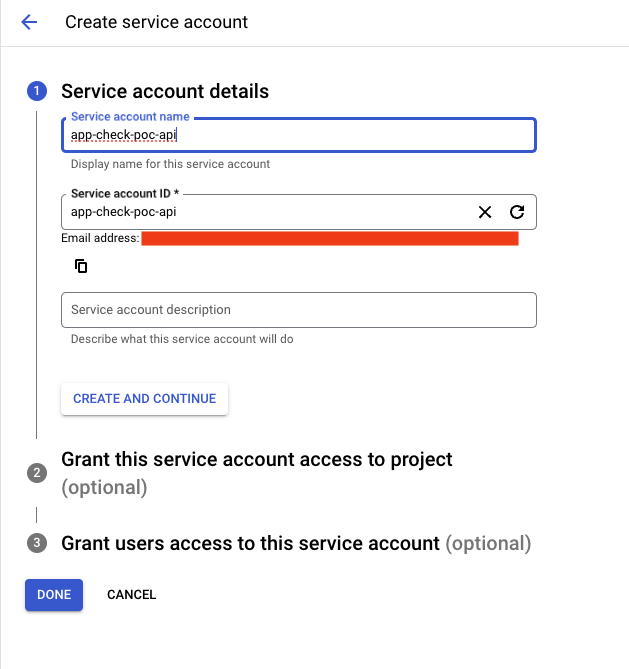
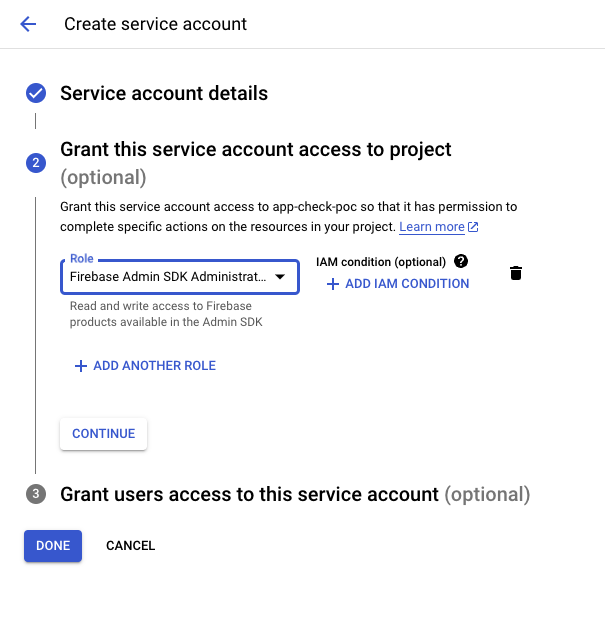
Give it a name and role. We will use the Firebase Admin SDK Administrator Service Agent role for this proof of concept.
After creating the service account, click on the newly created service account and go to the Keys tab. Create a new key and download it in JSON format.
Add the JSON file to the root of counter-api project and install firebase-admin.
pnpm add firebase-admin
In our server.js file, we will initialize the Firebase Admin SDK with the service account key file and create a middleware to protect our endpoints.
// server.js
const express = require("express");
const cors = require("cors")({ origin: true });
const admin = require("firebase-admin"); // Add this import
const { getAppCheck } = require("firebase-admin/app-check"); // Add this import
const serviceAccount = require("./app-check-poc-creds.json"); // Add this import

...

admin.initializeApp({
  credential: admin.credential.cert(serviceAccount),
});

...

// app check middleware
const appCheckVerification = async (req, res, next) => {
  const appCheckToken = req.header("X-Firebase-AppCheck");

  if (!appCheckToken) {
    res.status(401);
    return next("Unauthorized");
  }

  try {
    await getAppCheck().verifyToken(appCheckToken);

    // If verifyToken() succeeds, continue with the next middleware
    // function in the stack.
    return next();
  } catch (err) {
    res.status(401);
    return next("Unauthorized");
  }
};

app.get("/counter", [appCheckVerification], (req, res) => {
  res.json({ counter });
});

app.post("/counter", [appCheckVerification], (req, res) => {
  counter++;
  res.json({ counter });
});

...
Here we added a middleware called appCheckVerification that will check if the request has the X-Firebase-AppCheck header with the App Check token. If the token is not present or is invalid, we will return a 401 Unauthorized error.
Next, we need to add the App Check token to our requests
First, we'll run the app again and make sure our api is working as expected and responding with 401 Unauthorized to our requests.
Note, if you find problems with CocoaPods, you might need to run pod install --repo-update in the ios folder.
cd ios
pod install --repo-update
cd ..
Because we're logging the HTTP errors to the debug console, we should see a 401 Unauthorized error when we try to get the counter or increment it. This is because we're not sending the App Check token in our requests yet.

We will fix it by updating our main method to initialize Firebase and activate App Check.
For the sake of this proof of concept, and because we're not uploading our app to any stores, we will use the debug provider for both Android and iOS. In a real-world scenario, you should use the appropriate provider for each platform.
// main.dart
import 'package:flutter/material.dart';
import 'package:dio/dio.dart';
import 'package:firebase_core/firebase_core.dart'; // Add this import
import 'firebase_options.dart'; // Add this import
import 'package:firebase_app_check/firebase_app_check.dart'; // Add this import

...

Future<void> main() async {
  WidgetsFlutterBinding.ensureInitialized();
  await Firebase.initializeApp(
    options: DefaultFirebaseOptions.currentPlatform,
  );
  await FirebaseAppCheck.instance.activate(
    // Default provider for Android is the Play Integrity provider.
    // You can use the "AndroidProvider" enum to choose
    // your preferred provider. Choose from:
    // 1. Debug provider
    // 2. Safety Net provider
    // 3. Play Integrity provider
    androidProvider: AndroidProvider.debug,
    // Default provider for iOS/macOS is the Device Check provider.
    // You can use the "AppleProvider" enum to choose
    // your preferred provider. Choose from:
    // 1. Debug provider
    // 2. Device Check provider
    // 3. App Attest provider
    // 4. App Attest provider with fallback to Device Check provider
    // (App Attest provider is only available on iOS 14.0+, macOS 14.0+)
    appleProvider: AppleProvider.debug,
  );
  runApp(const MyApp());
}

...
Next, we need to update our _getCounter and _incrementCounter methods to add the App Check token to our requests.
// main.dart
  ...

  void _getCounter() async {
    try {
      final appCheckToken = await FirebaseAppCheck.instance.getToken();

      if (appCheckToken != null) {
        final response = await dio.get(
          '$kApiUrl/counter',
          options: Options(headers: {'X-Firebase-AppCheck': appCheckToken}),
        );
        setState(() {
          _counter = response.data['counter'];
        });
      } else {
        throw Exception('App Check token is null');
      }
    } catch (e) {
      debugPrint(e.toString());
    }
  }

  void _incrementCounter() async {
    try {
      final appCheckToken = await FirebaseAppCheck.instance.getToken();

      if (appCheckToken != null) {
        final response = await dio.post(
          '$kApiUrl/counter',
          options: Options(headers: {'X-Firebase-AppCheck': appCheckToken}),
        );
        setState(() {
          _counter = response.data['counter'];
        });
      } else {
        throw Exception('App Check token is null');
      }
    } catch (e) {
      debugPrint(e.toString());
    }
  }

  ...
We're not done yet
If we run the app now, we should see a 403 PERMISSION_DENIED error in the debug console when trying to access the Firebase App Check service. This is because we haven't added the App Check debug token to our Firebase project yet.
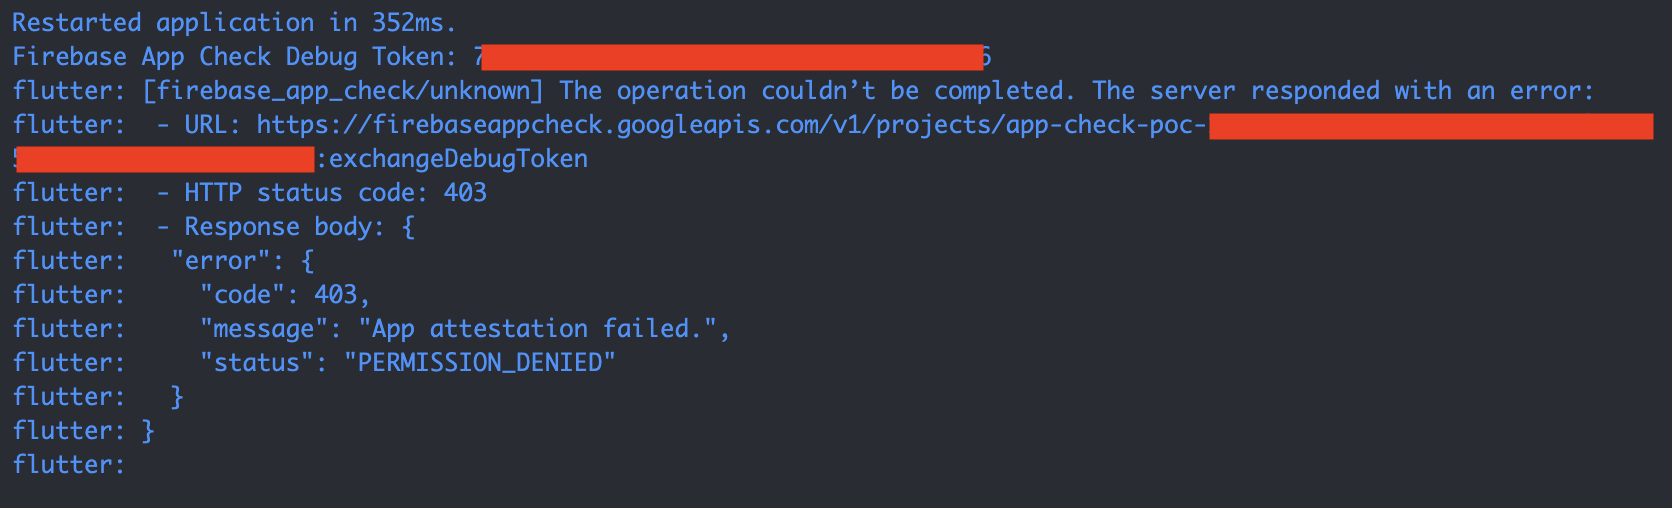
Notice that the token is logged in the debug console after Firebase App Check Debug Token when we run the app. We need to add this token in the Firebase console to allow our app to access the App Check service in debug mode.
Adding the App Check debug token in Firebase
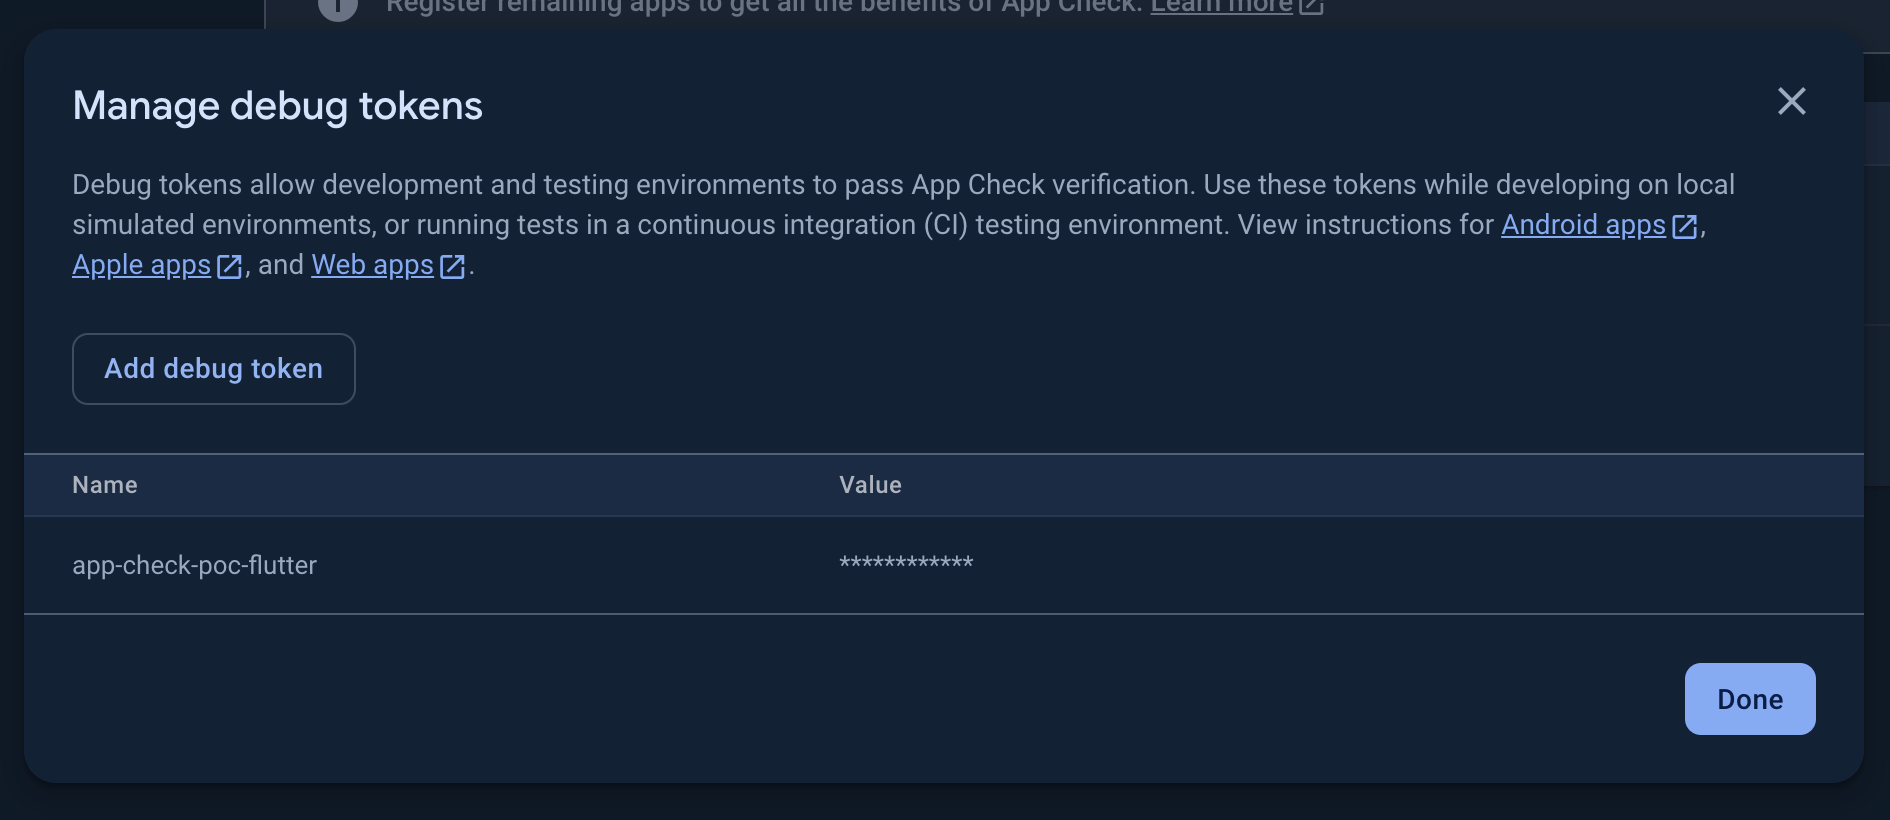
Go to the Firebase console and select your project. Then go to App Check and click on the Apps tab.
You should see your apps there. Click on the three dots on the right side of the app and select Manage Debug Tokens.
Give it a name and paste the token from the debug console in the Value field. Click on Save, and you should be good to go.
If we run the app now, we should see the counter incrementing as expected. When reloading or restarting the app, the counter should reflect our last changes, as it did before.
Conclusion
In this blog post, we implemented a simple counter app with a Node.js server and a Flutter app. We then added Firebase App Check to protect our server from abuse.
Firebase App Check is a powerful tool to protect your backend resources from unauthorized access. It works with Firebase services, Google Cloud services, and your own APIs to keep your resources safe.
App Check relies on the strength of its attestation providers to determine app or device authenticity. It prevents some, but not all, abuse vectors directed towards your backends. Using App Check does not guarantee the elimination of all abuse, but by integrating with App Check, you are taking an important step towards abuse protection for your backend resources.
It should not be used as the only security measure to protect your resources but rather as an additional layer of security.
In a real-world scenario, you should use the appropriate App Check provider for each platform and add the appropriate token to your requests to protect your resources.
Check the Firebase App Check documentation for more information and to see how you can integrate it with your own APIs.